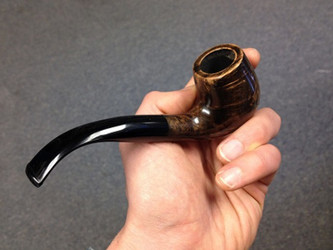
All tobacco pipes need to be cleaned well and regularly. Proper cleaning could not only make your tobacco last longer, but it could even help you tailor the experience further to your likes and dislikes through the choice of cleaning alcohol. There are two basic cleaning routines for briar pipes. Both of these routines, and the supplies you will need to complete them, are detailed below.
Regular Cleaning of Your Briar Pipe
All tobacco pipes should be cleaned regularly to improve the longevity and the quality of every smoke. It is recommended that your pipe be emptied and wiped down after every smoke but the following routine should be used once a week or every three to four uses, depending on the condition of your briar pipe.
Supplies You Will Need:
- Soft-Bristle Pipe Cleaners, Q-Tips Optional
- Cleaning Solution, High-Proof Alcohol, Liquor, or Rubbing Alcohol
- Pipe Tool or Reamer
- Polish, Wax, or Oil
- Polishing Cloth
- Cleaning Cloth or Paper Towels
How to Do a Regular Cleaning of Your Briar Pipe
First Steps
Always make sure your tobacco pipe has had a chance to cool down and dry out before beginning any cleaning routine. Empty the pipe on a soft surface.
Once this is done, wipe down the rim of the pipe with a dry or barely damp cloth. Do not apply any alcohol to the exterior of your briar pipe as this may damage the finish. Attempt to wipe away any tar from the wood. It should be possible to remove all tar. If a significant amount of tar remains, it may be time for a deep cleaning.
Clean the Shank, Stem, and Bowl
Disassemble the briar pipe by removing the stem (mouthpiece). Always pull the mouthpiece straight back and, if you must twist it, always twist to the same side to retain a tight fit over time.
To clean the stem, run a dry, soft pipe cleaner through the stem several times until the pipe cleaner comes out clean. If the pipe cleaner sticks or residue prevents it from cleaning smoothly, dip the pipe cleaner or a Q-Tip in a small amount of alcohol or solution. Swipe this solution through the stem several times followed by another dry pipe cleaner to finish the job.
To clean the shank, where the stem meets the bowl, insert a doubled-over soft pipe cleaner and gently sweep the inside of the shank until the pipe cleaner comes out clean. If there is too much residue to be easily removed in this way, follow the same steps as cleaning residue from the stem.
To clean the bowl of the tobacco pipe, double another clean pipe cleaner and gently sweep around the sides of the bowl to remove any loose particles. A light amount of scraping with a pipe cleaning tool may be done, but not all of the residue should be removed from this area at this time. If the cake appears to be too thick, consider following the additional steps required for deep cleaning.
Deep Cleaning of Your Briar Pipe
Tobacco pipes should be deep cleaned at least two to three times a year, or more frequently if any problems develop. This process is very similar to a regular pipe cleaning with a few extra steps.
What You Will Need:
- Soft or Hard Bristle Pipe Cleaners, Q-Tips Optional
- Cleaning Solution, High-Proof Alcohol, Liquor, or Rubbing Alcohol
- Salt
- Pipe Tool or Reamer
- Polish, Wax, or Oil
- Polishing Cloth
- Cleaning Cloth or Paper Towels
How to Do a Deep Cleaning of Your Briar Pipes
First Steps
The beginning of a deep clean is very similar to the process used to regularly clean briar pipes. As with a light or daily cleaning, it's important to let your briar pipe cool and dry out before beginning any cleaning. Once your briar pipe is cool, empty the bowl by tapping it against the palm of your hand or another soft surface.
Clean the Rim
Clean the rim with a soft, dry cloth and, if necessary, a Q-tip that has been lightly soaked in liquor and not harsher alcohol. Be careful to keep any alcohol on the rim and any tar. Do not allow this liquid to drip down over the sides or finished areas of the pipe.
Clean the Stem and Shank
Separate the shank and the stem of your briar pipe. Run a pipe cleaner of your choice through the stem to assess its condition. If necessary, this is where you can use high-proof alcohol to clean out the shank. Follow this same process to clean the stem. Use small bits of dry cloth, cotton, or paper towel to cover any area that may need extra protection from any excess alcohol.
Clean the Bowl
The most involved step will be cleaning the bowl of your briar pipe. For this, it's possible to use a small, dull spoon but it's never a bad idea to invest in a pipe reamer to prevent accidental damage and to reduce the amount of time spent cleaning, especially if you have a collection of tobacco pipes.
Not all cake must be removed. Either gently scrape excess cake out with a dull blade or insert the reamer into the bowl and twist a few turns while gently pressing down. Repeat this in the opposite direction. Empty the bowl by tapping it on a soft surface. This process may be repeated, though it often does not need to be if the pipe is cleaned regularly.
Optional: Salt Soak
If the bowl requires a particularly deep cleaning, a salt soak is often the first and best option beyond the process listed above. First, stuff the shank with a barrier material wrapped around a pipe cleaner or Q-tip. This could be cling film, wax paper, or another non-absorbent material you have on hand.
Next, fill the bowl with salt. Large-flake salt is easier to remove after the process is complete but table or fine-grain salt may be used as well. Any type of salt can be used - sea salt, kosher salt, and Epsom salts are all fine choices.
Drip a small amount of alcohol into the bowl. Many people choose to use a favorite liquor for this, but a plain high-proof vodka can be a good flavorless alternative. The salt should be damp but not wet. There should be no excess liquid pooling on top of the salt.
After soaking for 24 hours, empty the pipe as you usually would. Pipe cleaners, cloth, or paper towels can be used to further clean the bowl and remove any residue. Any stick particles can be rinsed out with a few more drops of alcohol.
Finish
Once the pipe is clean and dry, polish, wax, or a drop or two of olive oil can be applied to the finish if desired. After this process, allow an additional 24 hours to pass before using your pipe to ensure that all finishes have set and that the pipe is completely dry before use.

 US Dollars
